There are currently 115 stubs. You can help us by expanding these articles!
Crash Bandicoot: Warped
| Crash Bandicoot: Warped | |||||||||
|---|---|---|---|---|---|---|---|---|---|

| |||||||||
| Developer(s) | Naughty Dog | ||||||||
| Publisher | Sony Computer Entertainment | ||||||||
| Release date(s) | PlayStation: PlayStation Network: | ||||||||
| Genre(s) | Platformer | ||||||||
| Rating(s) | Original release:
| ||||||||
| Console(s) | PlayStation, PlayStation Network | ||||||||
| Mode(s) | Single player | ||||||||
| Media | CD-ROM (PlayStation) Digital download (PSN) | ||||||||
| Input | PlayStation Controller | ||||||||
| This article uses content from Wikipedia (view authors), and falls under the compatible Creative Commons license. |
“Oh yeah.... he's back.... AND he's ready!”
— Tagline
Crash Bandicoot: Warped is the third game of the Crash Bandicoot series. The title is a direct sequel to Crash Bandicoot 2: Cortex Strikes Back. It was developed by Naughty Dog and published by Sony Computer Entertainment for the PlayStation in 1998. The story centers on Crash and Coco Bandicoot and their mission to gather Crystals scattered across time before Dr. Neo Cortex can obtain them. It is the last Crash Bandicoot platformer that was developed by Naughty Dog, thus concluding the original Crash Bandicoot trilogy.
A direct sequel, Crash Bandicoot: The Wrath of Cortex, was released in 2001 for the PlayStation 2 and in 2002 for the Xbox and Nintendo GameCube. In 2008, Crash Bandicoot: Warped was re-released for the PlayStation Network. In 2017, a remake of the game, along with its two predecessors, was included on Crash Bandicoot N. Sane Trilogy. A retcon that initially followed Warped, Crash Bandicoot 4: It's About Time, was released in 2020 for the PlayStation 4 and Xbox One and in 2021 for the PlayStation 5, Xbox Series X/S, Nintendo Switch, and PC.
Plot[edit]

The game takes place immediately after Crash Bandicoot 2: Cortex Strikes Back, in which Dr. N. Brio uses the gems Crash had collected to power his giant laser weapon to destroy Dr. Neo Cortex's space station. As a result, large chunks of the space station's debris plummet down to Earth and crash into an ancient monument. When the smoke clears, an evil entity flies off into the night.
Back on N. Sanity Island, the home of Crash and his friends, an evil laughter rings through the air. Aku Aku appears shaken and urges everyone to come inside, as a great evil has come.
In an as-of-now unknown area, Cortex is seen cowering before Uka Uka, who appears to have saved Cortex from the depths of space and is now upset that Cortex has failed him twice. Cortex insists that it is all Crash Bandicoot's fault but Uka Uka's patience is spent, as there is now no other power source on the planet; however, since Cortex has indirectly set him free, Uka Uka spares Cortex's life and introduces Dr. N. Tropy, master of time and the creator of the Time Twister that the trio is currently standing on. With N. Tropy's Time Twister, the villains plan on gathering the Power Crystals in their original places in time.
Inside Crash's home, Aku Aku tells the Bandicoots a story of how many eons ago, Uka Uka, Aku Aku's evil twin brother, was locked in an underground prison by Aku Aku to protect the world from his malice, and now that he is free, he must be stopped at all cost. With that, Crash and his friends travel to the Time Twister Machine, where their adventure begins.
After Crash and Coco have defeated N. Tropy (along with Cortex's minions, Tiny Tiger, Dingodile and Dr. N. Gin) and collected all of the Crystals and all of the Gems, Crash battles Cortex in the core of the Time Twister Machine. Upon Cortex's defeat, the Time Twister implodes (due to N. Tropy's defeat), taking Cortex, Tropy, and Uka Uka with it. Crash and the others escape just in time for the snow season. As the ending credits roll, it is seen that the three villains are trapped in a time prison, with Cortex and Tropy transformed into infants and fighting over Uka Uka's possession.
Gameplay[edit]

Crash Bandicoot: Warped takes place in a hub area titled the Time Twister, which every level is accessed from. There are five Time Warp chambers, each containing five levels and a boss fight, which can be accessed once Crash completes the five levels and obtains the crystal in each one. After completing the boss fight, Crash can access the next Time Warp chamber. The game supports the DualShock controller, which gives off a vibration in certain parts, such as while Crash or Coco are riding a vehicle. Whenever Crash starts one of two certain levels of a Time Warp chamber or its boss battle, a cutscene is shown in which that chamber's boss talks to Crash.
The gameplay is largely similar to the first two games, because in most levels, Crash or Coco must follow a path to the end. Crash Bandicoot: Warped emphasizes the use of vehicles, such as a plane or a jetski. There are a few prehistoric-themed levels in which Crash can ride a small T-Rex named Baby T and a few China-themed levels where Coco can ride a small tiger named Pura. Super Powers are introduced in the game, and are obtained for defeating a boss. Super Powers permanently give Crash an extra ability, such as a longer spinning attack or a double jump.
In every level, Crash can obtain a Clear Gem if he has destroyed every box. Some levels allow Crash to obtain another gem if he has completed a certain task, such as winning a race. By doing so, the Clear Gem appears at the end, in front of the exit portal. Some levels have a Colored Gem, which Crash can obtain by completing a level's secret area.
Crash Bandicoot: Warped introduces a Time Trial mode in each level, where the goal is for Crash to race through a level as quickly as possible. Time Boxes are laid throughout, and can freeze time for either one, two, or three seconds. If Crash is quick enough at completing a level in Time Trail, he is rewarded a Relic, which is either sapphire, gold, or platinum, depending on the completion time.
If Crash collects all five Relics of a Time Warp chamber, a platform appears in the middle, and it takes him to a hidden sixth Time Warp chamber. Each of its five levels are unlocked individually, by collecting every Relic from a certain Time Warp chamber, including the ones before it. Two of the levels in the hidden Time Warp chamber are a secret entrance to an earlier level. In total, there are 32 regular levels (30 if the two "secret entrance" levels are excluded) and five boss fights.
To complete the game, Crash must have collected all 25 Crystals, 45 Gems, and 30 Relics. If Crash has earned a 100% completion score, a second and final battle against Cortex is unlocked, and completing it unlocks an alternate ending.
Listings[edit]
Characters[edit]
Playable[edit]
Bosses[edit]
Supporting Cast[edit]
Cameos[edit]
Levels[edit]
The game has a time travel theme, so each level and, by extension, the Time Travel Areas, are themed after a certain time period or setting, including medieval kingdoms, underwater areas, areas within the Great Wall of China, the dinosaur era, pirate oceans, a Roman colosseum, Arabian bazaars, desert interstates, Egyptian ruins, the ice ages, a futuristic dungeon, sky areas, a futuristic city, the moon, and laboratories. The following charts show the international Relic times, with the European times in italics.
| Levels | |||||||||||
|---|---|---|---|---|---|---|---|---|---|---|---|
| Medieval Location[2] | |||||||||||
| # | Icons | Level | Boxes | Relic times | Developer time | Theme | Collectible items | Unlock criterion | |||
| Time Portal | Load/Save | Sapphire | Gold | Platinum | |||||||
| 1 | 
|
Toad Village |
42 | 1:03:00 1:02:00 |
0:57:50 0:56:52 |
0:44:03 0:43:00 |
0:39:93 (Andrew Woodworth) | Grassy | 1 Crystal 1 Clear Gem 1 Relic |
Available from the start | |
| 2 | 
|
Under Pressure |
92 | 1:46:00 | 1:17:90 1:17:92 |
1:10:50 1:10:48 |
0:57:83 (Shawn Dobbins) | Underwater | 1 Crystal 1 Clear Gem 1 Relic |
Available from the start | |
| 3 | 
|
Orient Express |
51 | 0:41:00 | 0:27:80 | 0:18:10 0:18:08 |
0:16:96 (Justin Monast) | East Asian | 1 Crystal 1 Clear Gem 1 Relic |
Available from the start | |
| 4 | 
|
Bone Yard |
66 | 1:45:00 1:43:00 |
1:40:20 1:38:20 |
1:21:00 1:19:00 |
1:15:36 (Donovan Soto) | Forest Fire |
1 Crystal 2 Clear Gems 1 Relic |
Available from the start | |
| 5 | 
|
Makin' Waves |
37 | 1:08:00 | 0:58:23 0:58:20 |
0:53:23 0:53:24 |
0:50:66 (Andrew Woodworth) | N. Sanity Beach | 1 Crystal 1 Clear Gem 1 Relic |
Available from the start | |

|
Tiny Tiger |
- | - | - | Ancient ruins | Super Charged Body Slam | Collect 5 Crystals | ||||
| Arabic Location[3] | |||||||||||
| # | Icons | Level | Boxes | Relic times | Developer time | Theme | Collectible items | Unlock criterion | |||
| Time Portal | Load/Save | Sapphire | Gold | Platinum | |||||||
| 6 | 
|
Gee Wiz |
100 | 1:35:00 1:34:00 |
1:22:73 1:21:72 |
1:05:90 1:04:00 |
0:58:66 (Andrew Woodworth) | Grassy | 1 Crystal 1 Clear Gem 1 Relic |
Complete Tiny Tiger | |
| 7 | 
|
Hang'em High |
96 | 1:24:00 1:23:00 |
0:52:63 0:51:64 |
0:43:80 0:42:80 |
0:34:36 (Donovan Soto) | Urban Desert |
1 Crystal 1 Clear Gem 1 Yellow Gem 1 Relic |
Complete Tiny Tiger | |
| 8 | 
|
Hog Ride |
13 | 0:45:00 | 0:41:43 0:41:44 |
0:35:06 0:35:04 |
0:33:96 (Evan Wells) | Desert Urban |
1 Crystal 1 Clear Gem 1 Relic |
Complete Tiny Tiger | |
| 9 | 
|
Tomb Time |
95 | 1:42:00 1:41:00 |
1:10:00 1:09:00 |
0:53:90 0:52:92 |
0:50:63 (Corey Strock) | Desert Ancient ruins |
1 Crystal 2 Clear Gems 1 Relic |
Complete Tiny Tiger | |
| 10 | 
|
Midnight Run |
35 | 0:51:00 0:53:00 |
0:38:23 0:38:20 |
0:18:20 | 0:13:20 (Evan Wells) | East Asian | 1 Crystal 1 Clear Gem 1 Relic |
Complete Tiny Tiger | |

|
Dingodile |
- | - | - | Winter | Double Jump | Collect 10 Crystals | ||||
| Oriental Location[4] | |||||||||||
| # | Icons | Level | Boxes | Relic times | Developer time | Theme | Collectible items | Unlock criterion | |||
| Time Portal | Load/Save | Sapphire | Gold | Platinum | |||||||
| 11 |
|
Dino Might! |
112 | 1:34:00 1:33:00 |
1:25:76 1:24:76 |
1:03:00 1:02:00 |
0:55:00 (Donovan Soto) | Forest Fire |
1 Crystal 2 Clear Gems 1 Relic |
Complete Dingodile | |
| 12 |
|
Deep Trouble |
83 | 1:47:00 | 1:25:13 1:25:16 |
1:18:33 1:18:36 |
1:00:46 (Shawn Dobbins) | Underwater | 1 Crystal 1 Clear Gem 1 Red Gems 1 Relic |
Complete Dingodile | |
| 13 | 
|
High Time |
85 | 2:12:00 | 1:04:10 1:04:12 |
0:56:93 0:56:96 |
0:45:10 (Corey Strock) | Urban Desert |
1 Crystal 1 Clear Gem 1 Purple Gem 1 Relic |
Complete Dingodile | |
| 14 | 
|
Road Crash |
25 | 1:25:00 | 1:20:70 1:20:72 |
1:17:10 1:17:08 |
1:15:53 (Shawn Dobbins) | Desert Urban |
1 Crystal 1 Clear Gem 1 Relic |
Complete Dingodile | |
| 15 | 
|
Double Header |
91 | 1:27:00 | 1:21:13 1:21:16 |
0:59:40 | 0:56:00 (Andrew Woodworth) | Grassy | 1 Crystal 1 Clear Gem 1 Relic |
Complete Dingodile | |

|
N. Tropy |
- | - | - | Industrial | Death Tornado Spin | Collect 15 Crystals | ||||
| Egyptian Location[5] | |||||||||||
| # | Icons | Level | Boxes | Relic times | Developer time | Theme | Collectible items | Unlock criterion | |||
| Time Portal | Load/Save | Sapphire | Gold | Platinum | |||||||
| 16 |
|
Sphynxinator |
105 | 1:42:00 | 1:22:63 1:22:64 |
0:56:70 0:56:68 |
0:50:63 (Evan Wells) | Ancient ruins | 1 Crystal 2 Clear Gems 1 Relic |
Complete N. Tropy | |
| 17 | 
|
Bye Bye Blimps |
11 | 1:09:00 | 0:58:40 | 0:51:50 0:51:48 |
0:38:63 (Jason Rubin) | Sky theme Grassy |
1 Crystal 1 Clear Gem 1 Relic |
Complete N. Tropy | |
| 18 | 
|
Tell No Tales |
61 | 1:42:00 | 1:25:63 1:25:64 |
1:05:23 1:05:24 |
1:01:70 (Shawn Dobbins) | N. Sanity Beach | 1 Crystal 1 Clear Gem 1 Relic |
Complete N. Tropy | |
| 19 | 
|
Future Frenzy |
133 | 2:01:00 | 1:34:00 | 1:19:63 1:19:64 |
1:07:47 (Shawn Dobbins) | Industrial Urban |
1 Crystal 2 Clear Gems 1 Relic |
Complete N. Tropy | |
| 20 | 
|
Tomb Wader |
88 | 2:44:00 | 1:45:03 1:45:04 |
1:24:00 | 1:11:16 (Corey Strock) | Ancient ruins | 1 Crystal 1 Clear Gem 1 Blue Gem 1 Relic |
Complete N. Tropy | |

|
N. Gin |
- | - | - | Space | Fruit Bazooka | Collect 20 Crystals | ||||
| Future Location[6] | |||||||||||
| # | Icons | Level | Boxes | Relic times | Developer time | Theme | Collectible items | Unlock criterion | |||
| Time Portal | Load/Save | Sapphire | Gold | Platinum | |||||||
| 21 |
|
Gone Tomorrow |
87 | 2:05:00 | 1:25:60 | 1:02:10 | 0:55:46 (Andrew Woodworth) | Industrial Urban |
1 Crystal 2 Clear Gems 1 Relic |
Complete N. Gin | |
| 22 | 
|
Orange Asphalt |
20 | 1:36:00 | 1:33:30 1:31:28 |
1:21:80 | 1:16:70 (Shawn Dobbins) | Desert Urban |
1 Crystal 1 Clear Gem 1 Relic |
Complete N. Gin | |
| 23 | 
|
Flaming Passion |
75 | 1:43:00 1:42:00 |
1:13:10 1:12:08 |
0:59:40 0:58:40 |
0:51:10 (Andrew Woodworth) | Urban Desert |
1 Crystal 1 Clear Gem 1 Green Gem 1 Relic |
Complete N. Gin | |
| 24 | 
|
Mad Bombers |
11 | 2:08:00 | 1:55:23 1:55:20 |
1:38:13 1:38:16 |
1:24:10 (Sam Thompson) | Sky Winter |
1 Crystal 1 Clear Gem 1 Relic |
Complete N. Gin | |
| 25 | 
|
Bug Lite |
120 | 1:49:00 1:47:00 |
1:34:86 1:32:84 |
1:14:90 1:12:92 |
1:08:00 (Evan Wells) | Desert Ancient ruins |
1 Crystal 2 Clear Gems 1 Relic |
Complete N. Gin | |

|
N. Cortex |
- | - | - | Ancient ruins Industrial |
Speed Shoes | Collect 25 Crystals | ||||
| Neo-Cor Systems | |||||||||||
| # | Icons | Level | Boxes | Relic times | Developer time | Theme | Collectible items | Unlock criterion | |||
| Time Portal | Load/Save | Sapphire | Gold | Platinum | |||||||
| 26 | 
|
Ski Crazed |
100 | 1:16:00 | 0:50:50 0:50:48 |
0:33:30 0:33:32 |
0:28:63 (Dan Arey) | N. Sanity Beach | 1 Clear Gem 1 Relic |
Collect 5 Relics | |
| 27 |
|
Hang'em High (alternate entrance) |
96 | 1:24:00 1:23:00 |
0:52:63 0:51:64 |
0:43:80 0:42:80 |
0:34:36 (Donovan Soto) | Urban Desert |
1 Crystal 1 Clear Gem 1 Yellow Gem 1 Relic |
Collect 10 Relics | |
| 28 | 
|
Area 51? |
24 | 1:53:00 | 1:49:80 | 1:44:50 1:44:48 |
1:38:96 (Shawn Dobbins) | Desert Urban |
2 Clear Gems 1 Relic |
Collect 15 Relics | |
| 29 |
|
Future Frenzy (alternate entrance) |
133 | 2:01:00 | 1:34:00 | 1:19:63 1:19:64 |
1:07:47 (Shawn Dobbins) | Industrial Urban |
1 Crystal 1 Clear Gem 1 Relic |
Collect 20 Relics | |
| 30 | 
|
Rings of Power |
33 | 1:20:00 1:22:00 |
1:01:43 1:03:44 |
0:51:73 0:53:76 |
0:47:93 (Evan Wells) | Sky Desert |
2 Clear Gems 1 Relic |
Collect 25 Relics | |
| Other secret levels | |||||||||||
| # | Load/Save icon | Level | Boxes | Relic times | Developer time | Theme | Collectible items | Access method | |||
| Sapphire | Gold | Platinum | |||||||||
| 31 | Hot Coco |
70 | 1:00:00 1:00:00 |
0:30:10 0:30:08 |
0:19:93 0:19:96 |
0:14:60 (Andrew Woodworth) | N. Sanity Beach | 1 Clear Gem 1 Relic |
Run over a street sign with an alien on it in Road Crash | ||
| 32 | Eggipus Rex |
- | 0:55:00 | 0:50:03 0:50:00 |
0:44:83 0:44:80 |
0:41:10 (Andrew Woodworth) | Forest Fire |
1 Clear Gem 1 Relic |
Take the Yellow Gem path and jump onto the second pterodactyl in Dino Might! | ||
Items[edit]
| Name | Description |
|---|---|
| Colored Gem | There are a total of five Colored Gems, and collecting one unlocks a path in a certain level. Each gem is a different color and is found in a certain level: red (Deep Trouble), blue (Tomb Wader), green (Flaming Passion), yellow (Hang'em High), and purple (High Time). |
| Crystal | The main collectibles of the game. All five must be collected in each Time Warp chamber to unlock its boss stage. |
| Relic | A Relic is rewarded to Crash if he completes a level in Time Trial mode within a certain time. Relics come in three colors — sapphire, gold, and platinum — and the one rewarded depends on the completion time. |
| Stopwatch | Starts the Time Trial mode in a level. Only appears once Crash has completed the level at least once. |
Vehicles[edit]
| Vehicle | Description | Levels |
|---|---|---|
| Bi-plane | Piloted by either Crash or Coco in levels where they must shoot down blimps and fighter planes. A directional arrow points out where they must go. | Bye Bye Blimps, Mad Bombers, Rings of Power |
| Jet Ski | A vehicle that can travel on water surface. It is used by Coco in four levels, one of which is a hidden level. Like the Bi-plane, a directional arrow points out the correct way, except in the hidden level. | Makin' Waves, Tell No Tales, Ski Crazed, Hot Coco |
| Jet Sub | An underwater vehicle that Crash can use to fire missiles and travel underwater faster. | Under Pressure, Deep Trouble |
| Motorcycle | In four levels, Crash must ride a motorcycle to race against the hot rods. | Hog Ride, Road Crash, Orange Asphalt, Area 51? |
Spyro the Dragon demo[edit]
Crash Bandicoot: Warped has a playable demo of Spyro the Dragon, making it the first Crash Bandicoot game to have a playable demo of a Spyro game. The demo can be accessed from the title screen by inputting Up Up, Down, Down, Left, Right, Left, Right, and lastly the Square button. The code is similar to the Konami Code but with a Square button at the end rather than a "B" button and then an "A" button.
Reception[edit]
- GameSpot: 8.9 out of 10
- IGN: 9.1 out of 10
- GamePro: 5 out of 5
- The Electric Playground: 8 out of 10
- All Game Guide: 4.5 out of 5
- Electronic Gaming Monthly: 9.1 out of 10
- PSM: 4.5 out of 5
- Official PlayStation Magazine: 5 out of 5
- Play UK: 90 out of 100
Gallery[edit]
- For this subject's image gallery, see Gallery:Crash Bandicoot: Warped.
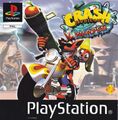
European box art
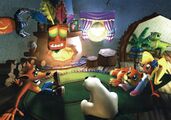
Group artwork of the characters inside the Bandicoot home


Trivia[edit]
- The Japanese version exclusively featured compatibility with the PocketStation, allowing the player to play exclusive minigames.
External links[edit]
References[edit]
- ↑ "Naughty Dog - 30 Year Timeline". Naughty Dog official website (archived).
- ↑ Crash Bandicoot N. Sane Trilogy (Prima Guide), page 146.
- ↑ Crash Bandicoot N. Sane Trilogy (Prima Guide), page 159.
- ↑ Crash Bandicoot N. Sane Trilogy (Prima Guide), page 175.
- ↑ Crash Bandicoot N. Sane Trilogy (Prima Guide), page 194.
- ↑ Crash Bandicoot N. Sane Trilogy (Prima Guide), page 210.